
3Create
Step 3: turn the texture into a full, tileable PBR material. Seam repair, checking the seams, and resolution.
Step 3 turns your texture into a full PBR material. In one go it improves the image (sharper, less grain, more detail), makes every map from it, and repaints the edges so the material tiles without visible seams.
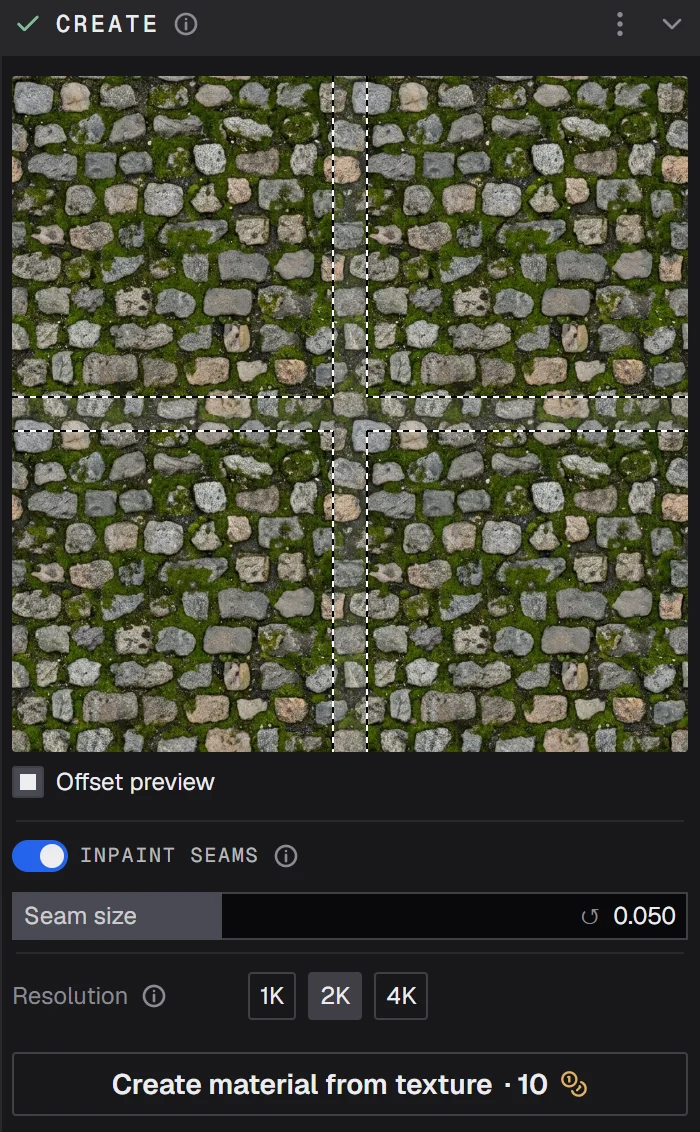
Inpaint seams
A texture made by AI or cut from a photo rarely repeats cleanly: where its right edge meets its left edge you'd see a line. Inpaint seams repaints a strip along all four edges with AI, so the edges flow into each other and the material tiles.
The dotted outline on the texture marks the strip that gets repainted. Seam size makes the strip wider or narrower. While you hold the slider, the shader ball shows the strip too, so you see where the repaint lands on the model.
- A wider strip hides harder seams, but repaints more of your texture.
- A narrower strip keeps more of the original, but may leave a seam if the edges are very different.
Leave Inpaint seams on unless your texture already tiles perfectly, for example a pattern you made to repeat.
Checking the seams
- Offset preview shifts the texture by half its size, so the four edges meet in the middle as a cross. That's where you'd see a seam once it tiles.
- The eye on the texture, or V, opens it full size in the 2D view; press T there to see it tiled.
Resolution
The size of the finished material's maps: 1K, 2K or 4K. Bigger gives more detail but takes longer and costs more credits. 4K needs a paid plan.
4K can take a few minutes, longer when our GPUs are busy. You don't have to wait: start another material meanwhile, and this one carries on in the background. Its tile in the library shows the progress.
Create
Click Create material from texture. The price in credits is on the button. A ring on the button shows the progress; it usually takes a minute or so.
When it's done, the shader ball shows the finished material, a row of map tiles appears along the bottom of the 3D view, and step 4, Tweak opens.
If the create fails, your credits are given back.
Prefer video? Our tutorials are on YouTube.